The
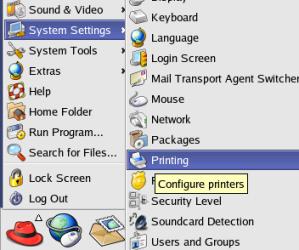
application to configure a printer is started by the selection
ofMenu
(red
Hat) – System
Settings - Printing.
|
Last
revision of this document: |
Prerequisites to understand the content of this document:* General knowledge how to enter a command on the command-line; respectively hot to start applications using a GUI |
Approximate expenditure of time to work over this document:Time to work on: ca. 30 minutes for each alternative installation. |
This document contains the description how to 'config' an attached printer; i.e. select the fitting driver for the given manufacturer and model and change the driver-parameters, if necessary.
It is also considered, that a GUI (Graphic User Interface) might not be available – e.g at a not so powerful computer been used as Router.
Additionally, a bugfix is described to correct an error in RedHat Linux version 9.
Preface
Prerequisites
Printer
Configuration with GNOME-GUI
Printer
Configuration if GUI is not available
SAMBA-Bugfix
in RedHat Linux Version 9
Things,
they are changing – that is also true for the
development-progress of Linux.
The appearance of the GUI (Graphic
User Interface) and description of the menu and applications are
changing slightly from version to version.
The screenshots within
this document were made from a RedHat**-Linux version 8.0 (published
in 2001).
Therefore following versions (till Fedora Core 7 in
2007) will look significantly different.
Nevertheless, the task
and the sequence of the installation stayed the same.
Don't be
confused if appearance and description in the version you are using
do not completely fit this description.
If you progressed through
the installation of Linux till here, the Configuration of a Printer
should not be an insuperable handicap for you ;-) .
Logged
on as user 'root'.
Valid for both methods.
Preparation:
Running automatic Hardware Detection
Configuration
of Pinters can shortened if the connected printer was already
recognized by the Hardware Detection.
Hardware Detection starts
shortly after Linux started the boot-process.
If you recently
connected a printer, switch it on and watch the boot-process of
Linux.
If Hardware Detection recognizes the printer you are asked
to confirm the configuration of the printer.
Start of
the Printer Configuration
|
|
|
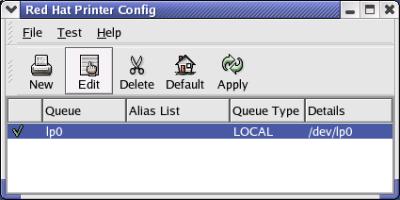
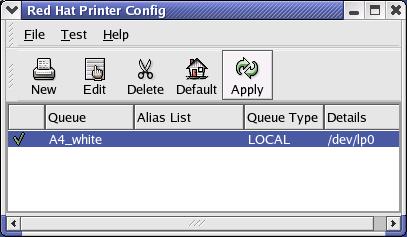
Display
with detected, respectively not detected printer
|
If
the printer was already configured by the Hardware Detection
program, it is already listed in the display. If you want to change the symbolic name of the Queue, please click onto the icon [Edit] and continue with the next step (Rename the QueueName); otherwise continue with Review Driver Options fort. |
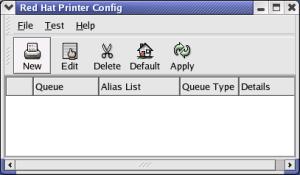
If
the printer was not found by the Hardware Detection the following
display appears. In that case please click ontot the icon [New] and continue with the step Add a new Print Queue . |
|
|
|
|
|
|
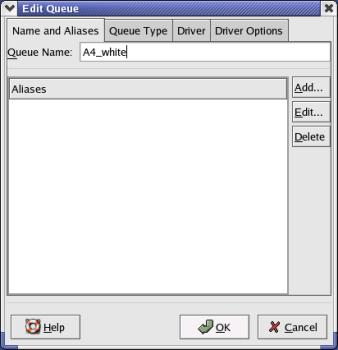
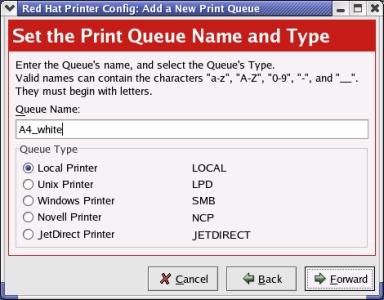
Set the
Print Queue Name and Type
|
|
|
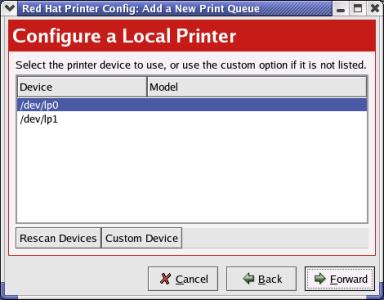
Configure
a Local Printer
|
|
|
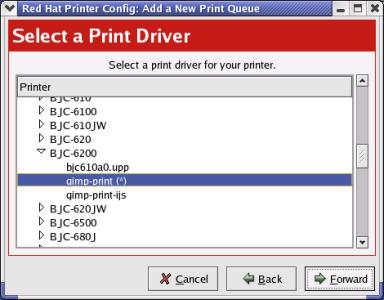
Select a
Print Driver
|
|
|
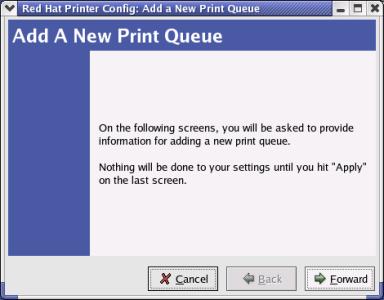
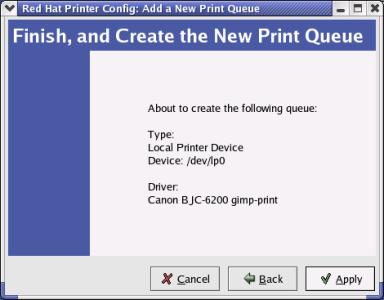
Finish
and Create the New Print Queue
|
|
|
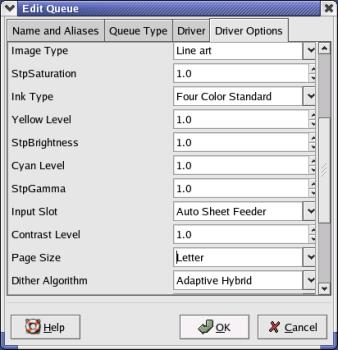
Review
Driver Options (Page Size, etc.)
|
|
|
Store
(Apply) of the changes made
|
|
|
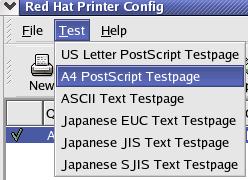
Testing
the printer
|
|
|
Preparation:
Running automatic Hardware Detection
Configuration
of Pinters can shortened if the connected printer was already
recognized by the Hardware Detection.
Hardware Detection starts
shortly after Linux started the boot-process.
If you recently
connected a printer, switch it on and watch the boot-process of
Linux.
If Hardware Detection recognizes the printer you are asked
to confirm the configuration of the printer.
Starting
the printer-configuration
Die
text-basierte Installation wird durch das Kommando
redhat-config-printer
begonnen.
Anzeige
bei erkanntem bzw. nicht erkanntem Drucker
Abhängig,
ob die automatische Hardware-Erkennung den Drucker bereits erkannt
hat, wird der Drucker bereits aufgelistet
RedHat
Linux 9 (maybe other versions too) was delivered with an error
preventing, that a printer, which was made accessible to other
workstations within the internal network using SAMBA, will print jobs
sent to it.
This error may confuse users, as the printer is listed
as 'ready', accepts print-jobs – but does not print them out.
Thanks for preliminary work to:
An
excellent documentation and solution of the problem can be found
under
http://www.wlug.org.nz/SambaPrinting.
A
big Thank You to the anonymous authors.
Prerequisites
Printer configured; see the sections Printer Configuration if GUI is not available and Printer Configuration with GNOME-GUI of this document.
The printer was made available for use by workstations with windows; siehe Einrichten des Samba-Servers > Drucker konfigurieren.
Installation Instruction
Open
the file
/etc/samba/smb.conf
and
identify the description for the installed printer.
The following
example is for an installed HP-Deskjet-340 and named
HPDJ-340
(therefore
identified with [HPDJ-340]).
For
your installation, the identifier will be different – for sure.
Add
the commands printed in bold:
[HPDJ-340]
comment
= portable printer
path = /var/spool/samba
read only =
No
printable = Yes
printer name = HPDJ-340
oplocks =
Noprint
command = lpr -P %p -o raw %s -r
lpq command = lpstat -o %p
lprm
command = cancel %p-%j
Test
'Install'
the printer on a workstation with windows and print a Test-Page.