Select
	>File>New>Project.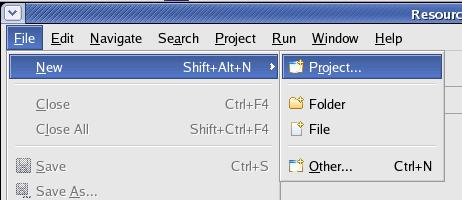
|
> Overview |
|
Last
revision of this document: |
This document describes the development of a very simple Java-program ('HelloWorld') under Eclipse.
Credits:A
very easily to understand description for basic-development under
Eclipse i found at the following web-site:
webster.fh-hagenberg.at/staff/jheinzel/
SWT5/Docs/Eclipse-Lobmoz-JBoss-Step-by-Step.pdf.
Eclipse installed - and all its prerequisites too ;-).
Preparation:Create
a new project (named JS_Base01)
in Eclipse:
Select
>File>New>Project.
In
	the New Project window select >Java Project and
	press the [Next >] button thereafter.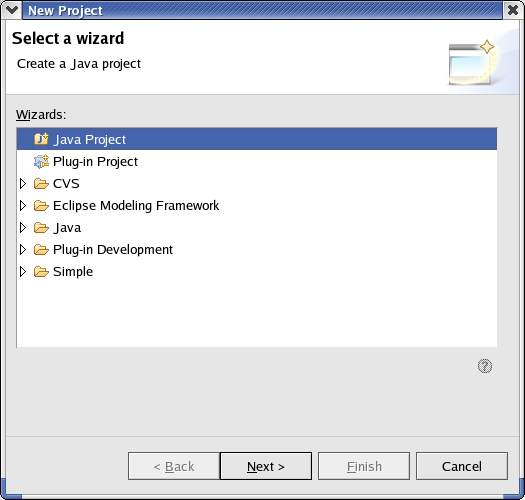
Enter
	the Project Name (JS_Base01),
	leave all other values unchanged and press
	the [Next >] button thereafter.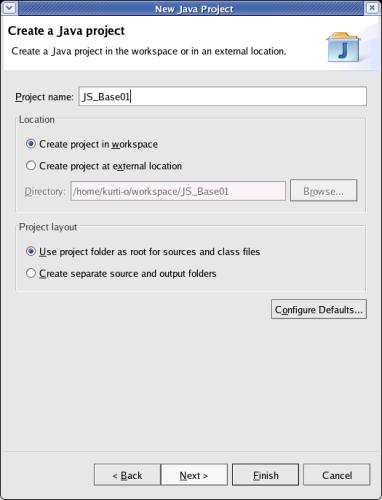
Leave
	the default values unchanged on the next frame as there are no
	settings necessary for this simple project.
To generate the
	framework press the [Finish] button.
If
	this was the first Java
	Project, then there is a question, if Eclipse should
	switch to the perspective for a Java Project.
It
	is recommended to press the [Yes]
	button.
If you decided to switch to the perspective
	always in a previous , then continue with Coding.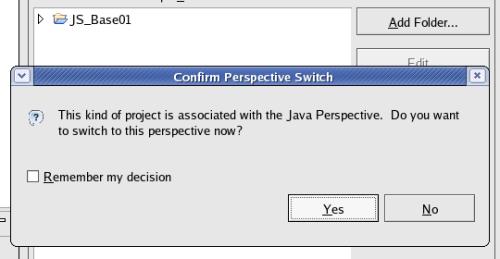
Coding:Create
a new Java Class by clicking the associated button on the
head-panel.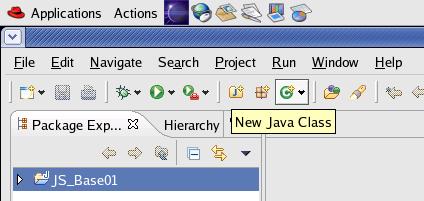
Enter
	the (Class-)Name (helloworld),
	check that you would like to create public
	static void main(String[] args),
	leave all other values unchanged and press
	the [Finish] button thereafter.
All other values can be
	left at their default value because this simple program is running
	in class named 'main', inheriting from superclass 'java.lang.Object'
	and Eclipse can generate a package with the name 'default'.
Please
	ignore the warning (The use of the default package is
	discouraged.) for this example. The code is so small and will be
	in a single class, therefore a Package named 'default' is
sufficient. 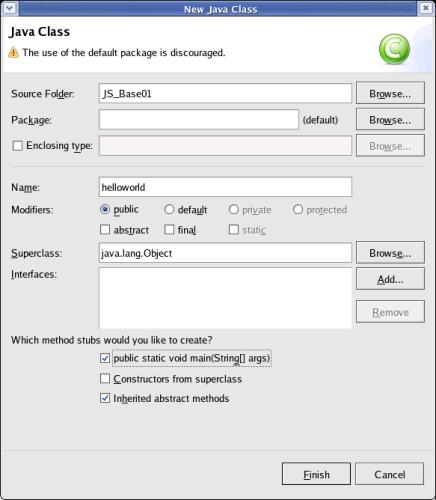
Eclipse
has already generated a template and the individual code can be
entered.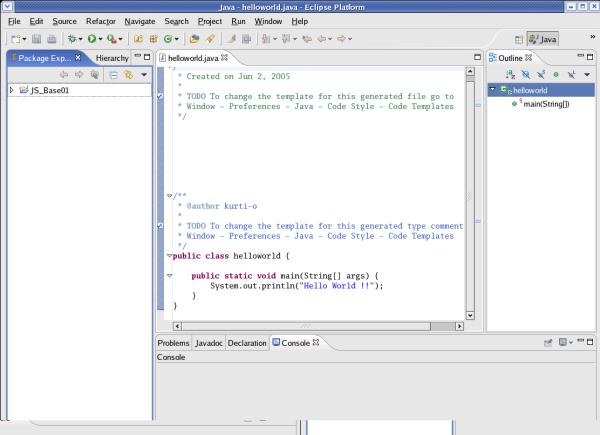
Here
is a better readable code:
public
class helloworld {
public
static void main(String[] args)
{
System.out.println(“Hello
World !!“);
}
}The
entered text can be saved by clicking the right mouse-button and
selecting Save
top.
Run
/ Test, Part 1:
Select
>Run>Run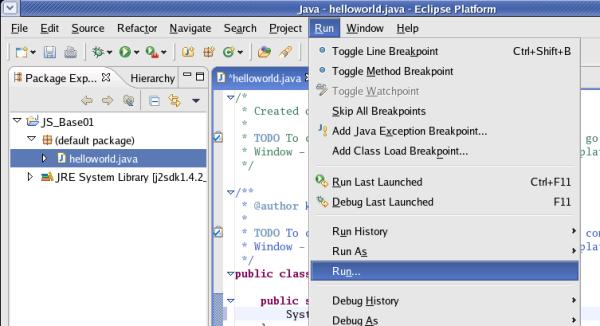
If
	you have already registered the runnable Class, this step will be
	skipped by Eclipse; continue with the
	next step.

If you want to run the Class for the first time, you have to
	register it.
To register the Class, select
	Java
	Application and click the
	[New] button.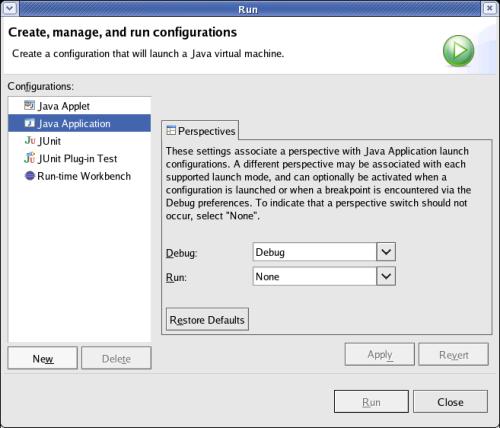
Select
	the Class you want to run and click the
	[Run] button.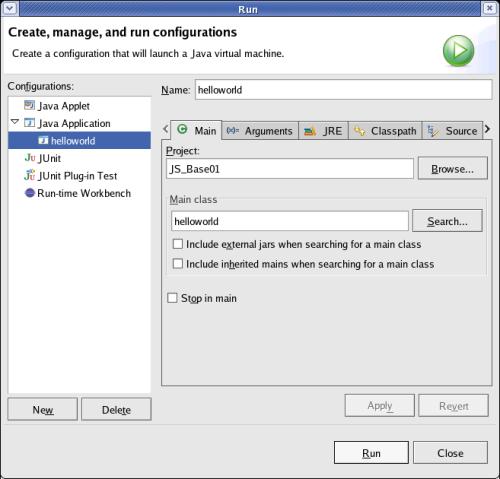
After
	the hidden compiling and executing of the code, the Console-window
	with the output is shown in the lower part of Eclipse.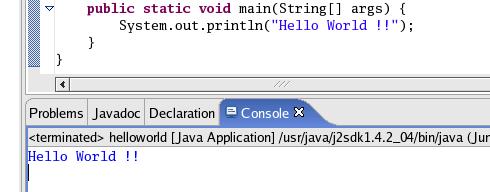
Pack
into a JAR (Java Archive):
Select
>File>Export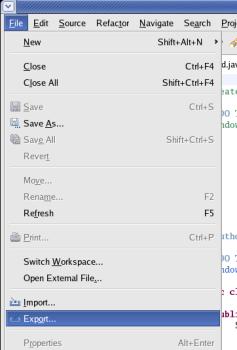
Select
	the kind of of archive you want to run and click the
	[Next] button.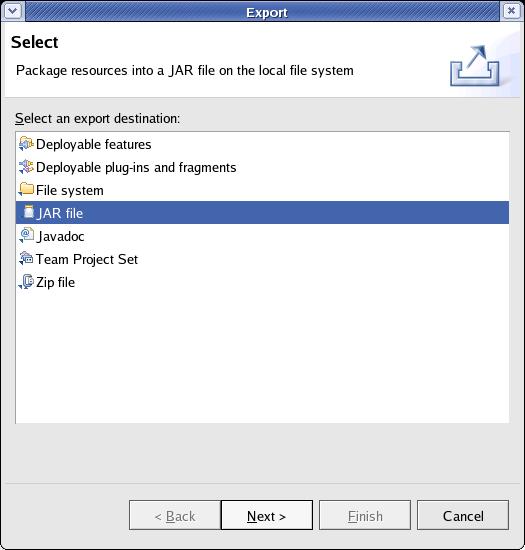
Select
	the Project you want to pack into the archive by marking
	it.
'Select
	the export destination', enter the directory were the jar-file will
	be stored and the file-name.
Leave all other selections
	unchanged.
Click the [Next] button.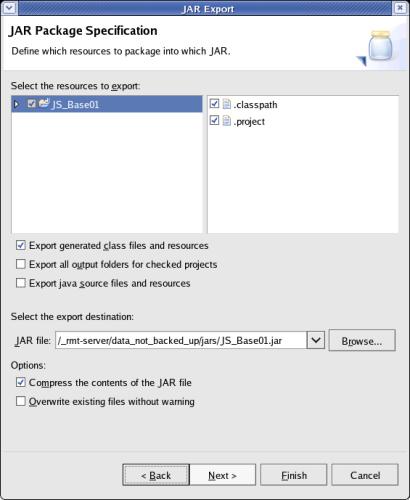
Unmark
	'Export class files with
	compile errors'.
Leave all other selections unchanged.
Click
	the [Next] button.
Select
	the 'Main class' using the
	[Browse...] button or type it into the
	entry-field.
This will start the class immediately after the
	Java-Run-Time finished loading the JAR-file.
Click
	the [Finish] button.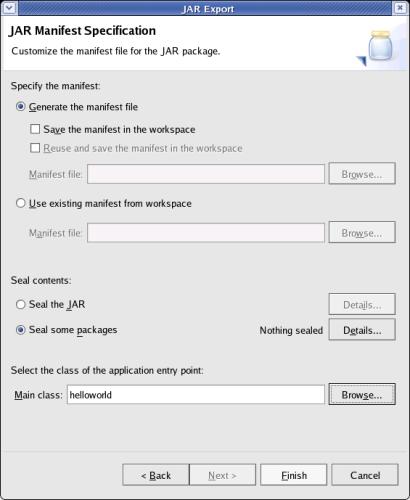
top.
Run
/ Test, Part 2:
Open
a Terminal-window in Linux.
Change to the directory were
the JAR-file was saved (specific for your environment):
cd
/_rmt-server/data_not_backed_up/jars
Enter
the following command:
java
-jar JS_Base01.jar
The
output of the 'helloworld'-example is output to the terminal. 
Related
Documents: