Select
>File>New>Project.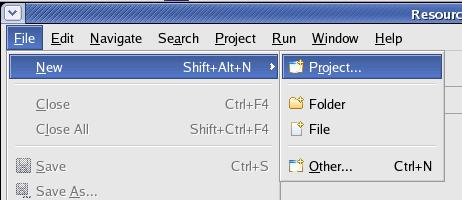
In
the New Project window select >Java Project and press the
[Next >] button thereafter.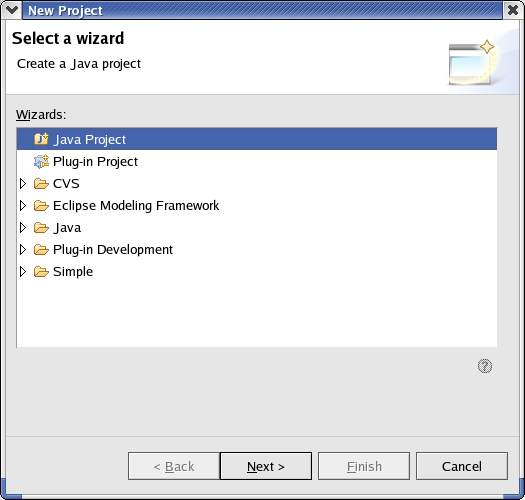
Enter
the Project Name (JS_Struts00),
leave all other values unchanged and press
the [Finish] button thereafter.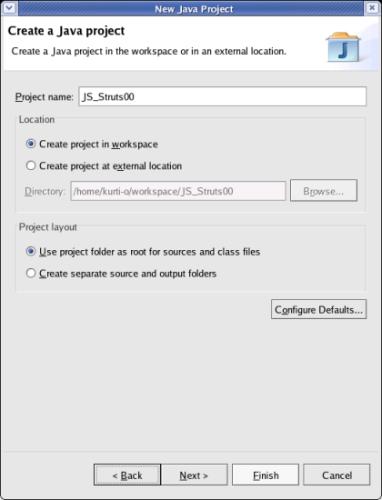
|
Last
revision of this document: |
This document gives instructions how to install the Struts framework into an Eclipse IDE.
The
Struts framework contains all Struts specific Java classes and sets
up a project-structure.
The imported framework is a base for the
development of own projects.
Operating-system installed ;-).
Eclipse installed.
The
installation is split into
   a Base-Installation
and
   an Improved
Configuration .
The
Base-Installation creates a project
and imports the Struts-framework into the just created project.
The
Improved Configuration
◊ sets
up additional directories to separate source-code and generated files
and◊ imports
additional Java-Archive- (JAR-)Files containing additional classes.
The
most current version (1.2.7 at the time of the last revision of this
document) can be downloaded as zipped file from the following
internet-site:.
http://archive.apache.org/dist/struts/binaries/
Download
the zipped file to a directory of your choice (furtheron referred as
download_directory).
After
the download is complete, change to the download_directory and
unzip:
cd
/download_directory
unzip
struts-1.2.7.zip
Import
the framework (struts-blank.war) into an Eclipse project
Create
a new project (named JS_Struts00)
in Eclipse:
Select
	>File>New>Project.
In
	the New Project window select >Java Project and press the
	[Next >] button thereafter.
Enter
	the Project Name (JS_Struts00),
	leave all other values unchanged and press
	the [Finish] button thereafter.
Import
the Struts framework (struts-blank.war)
into the project:
Select
	>File>Import.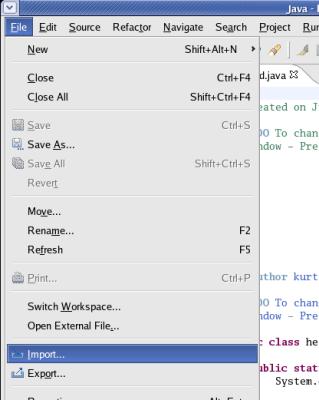
Select
	the type of file (Zip file) and press the [Next >] button
	thereafter.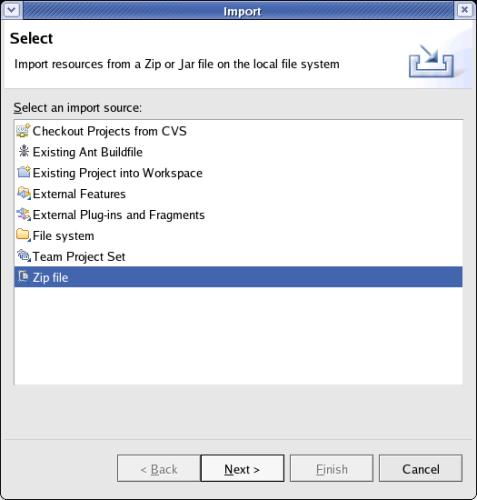
Select
	the
	'From zip file' using the [Browse...] button
	or
type
	it into the entry-field
	(/download_directory/struts-1.2.7/webapps/struts-blank.war).
Check
	the project to import (if not already
	checked)
and verify, that the 'Into folder' entry-field contains
	the correct project (JS_Struts00).

Press
	the [Finish]
	button to start the import.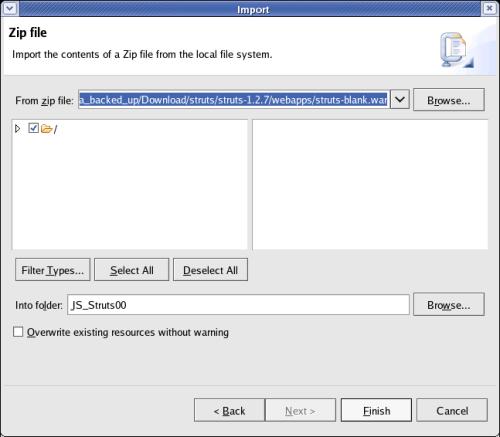
top.
Test:Verify
that the framework was imported by expanding the project (click onto
the triangle left of the project name).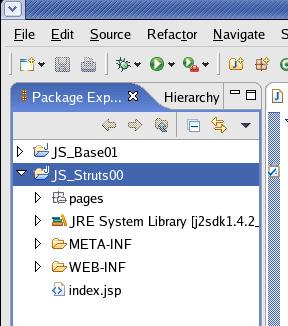
top.
Create separate directories for the source-code:
This step is a prerequisite for the Tutorial 'JS_Struts01 – HTML in a WAR' .
First,
the existing directory 'pages' is deleted.
It is intended to hold
the web-pages (*.html, *.jsp). This directory will be replaced by an
adequate one under the directory 'src' (source).
Right
click onto the directory 'pages' and select >Delete.
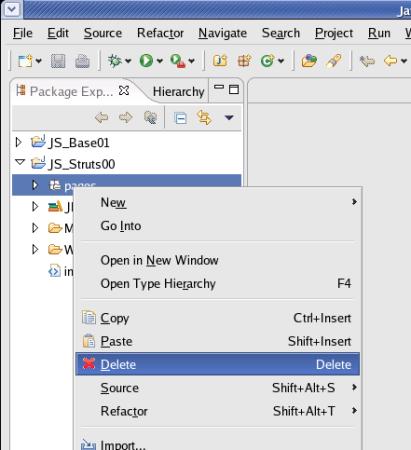
Confirm
on the next window (not shown in this documentation by clicking the
[Yes]-button.
Next,
new directories for the source (Java-code and Web-pages) are
created
A source directory for Java-Code is not already a
prerequisite for 'JS_Struts01
– HTML in a WAR', but it is easier to create it
now in one go.
Right
	click onto the project 'JS_Struts00' and select >New>Folder.
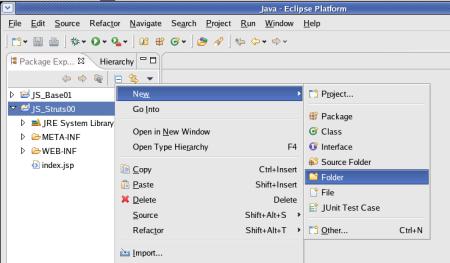
On
	the next window select the parent-folder ('JS_Struts00'), enter the
	name of the new folder ('src') and click the [ Finish ]-button.
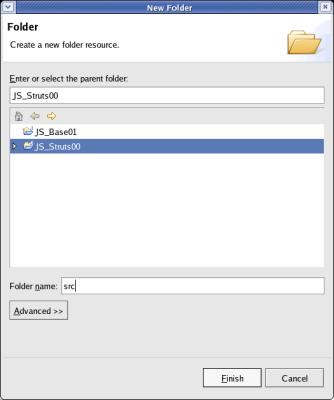
Repeat
	the two previous steps to create the folders 'java' and 'web-pages'
	under the parent-folder 'src'.
Hint:
	to expand the structure and to see sub-folders, click onto the
	triangle left of a folder.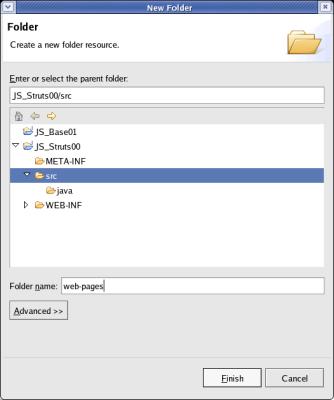
Next,
the 'Build Path' (were the compiler looks for Java-source-code) is
defined.
Right
	click onto the Project 'JS_Struts00' and select Properties.
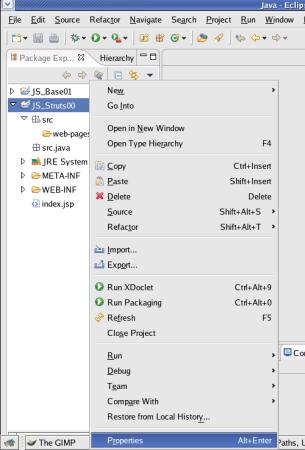
On
	the next window, the root-folder ('JS_Struts00') has to be removed
	from the Build Path.
To do so, select 'Java Build Path',
	Tab 'Source', mark the project
('Java_Struts00') and click the [Remove]-button 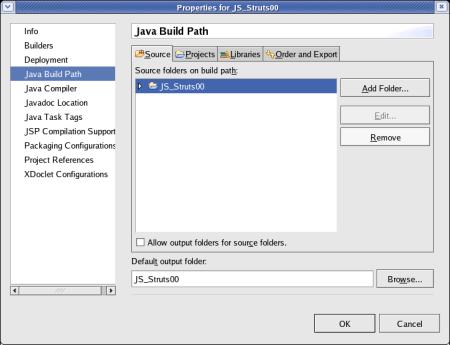
To
	avoid a collision of the folder structure for source and
	output-folders, the output-folder is moved from the root of the
	project ('JS_Struts00') to a subfolder named 'gen/classes' (gen –
	for generated).
To do so, enter JS_Struts00/gen/classes
in the entry-filed 'Default output-folder'. 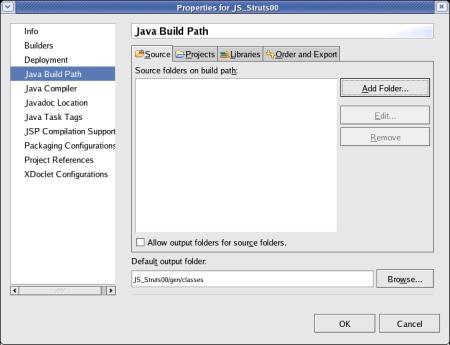
On
the same window click the [Add Folder... ]-button 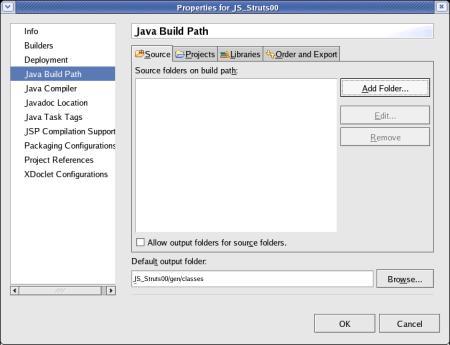
On
	the next window expand the structure until you can see the folder
	'java' under the folder 'src'.
Check
the folder 'java' and click the [ OK ]-button 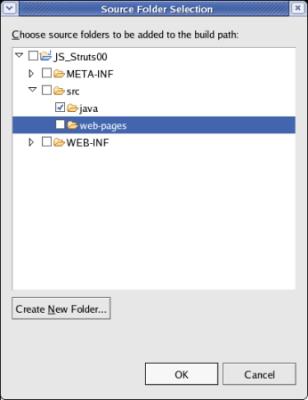
Next,
	the folder for the generated classes (JS_Struts00/gen/classes)
	is entered at the field 'default output folder'.
To finalize your
work, click the [ OK ]-button. 
Finally,
the 'index.jsp'-file in the root-folder is deleted.
(It will be
created again in the folder 'src/web-pages' in the following
lessons.)
expand
the project ('JS_Struts00') by clicking onto the triangle
left.
Right click onto the file 'index.jsp' and select
>Delete.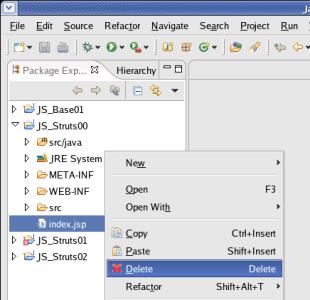
Confirm
your request for deletion on the following window.
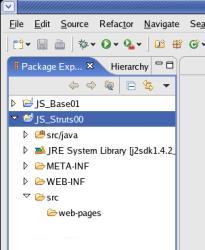
To
verify the changes, expand the project ('JS_Struts00') by clicking
onto the triangle left.
You should see, that the 'src/java' folder
is displayed directly under the project-folder.
top.